
- January 1, 2021
- Comments Disabled
Phase 1 (Introduction)
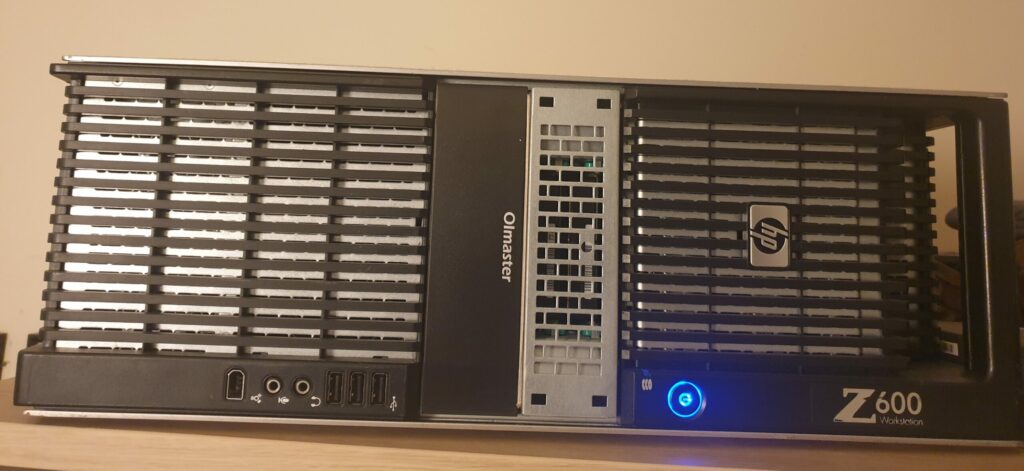
The system used for the configuration was a HP Z600 workstation. The intended purpose of the system was to run
several virtual machines, and since it was a workstation, already came preloaded with a respectable configuration.
- 2X x5675 Processors with a base clock if 3.06Ghz
- 64GB DDR3 Ram 2660MHz Frequency
- GTX Quadro NV S295
- 2X 500GB 10K RPM SATA drives
Figure 1 (External Workstation)
Phase 2
The limitation of the system was the storage speed and volume. The pre-installed drives were relatively fast for mechanical drives are were pre-configured into a RAID 0 array. Whilst this enhanced speed, it left no room for redundancy and introduced an added point of failure. So these were replaced with a SanDisk 2TBD SSD. This became the boot drive for the host OS (Windows 10 Pro). I may decide to clone my OS and create a RAID 1 mirror for added redundancy. How I fitted the SSD will be explained further
in the project outline.
Figure 2 (Internal Workstation)
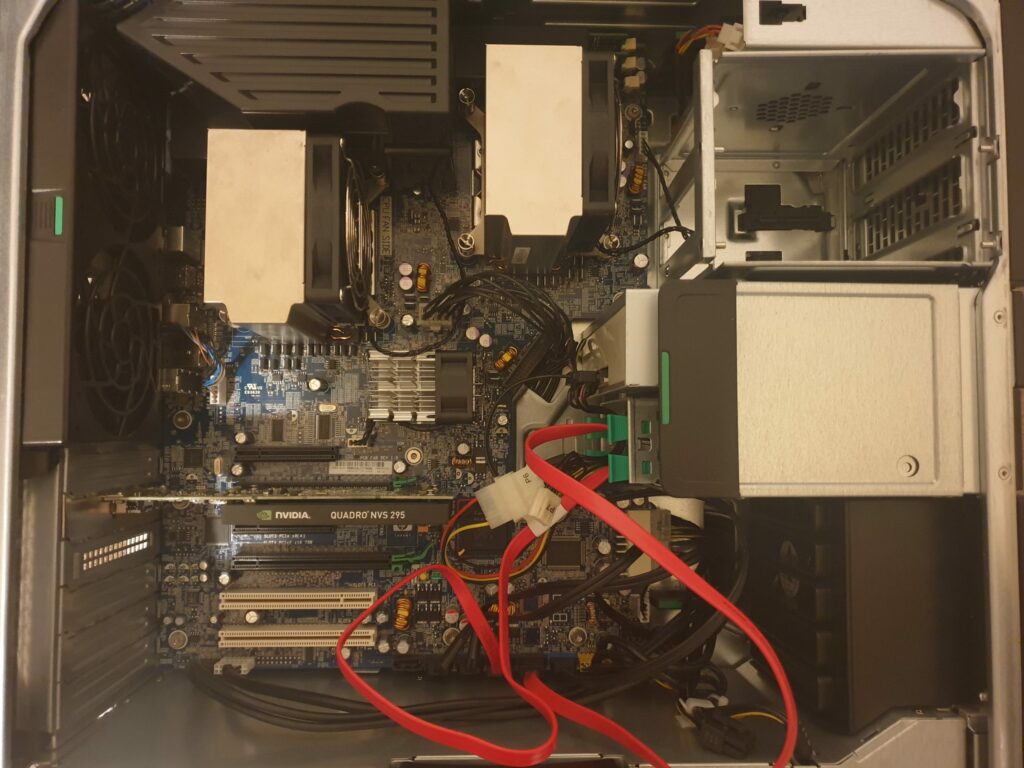
Once the boot drive and set up, and Windows was installed, I then turned my attention to additional storage. I wanted to create an efficient RAID array that utilized as much disc space as possible whilst allowing redundancy. Speed was not an issue in this case, as the OS and applications are all stored on the 2TB SSD. The obvious answer in this case was a RAID 5 set up, using three 2TB HDD WD NAS drives.
Phase 3
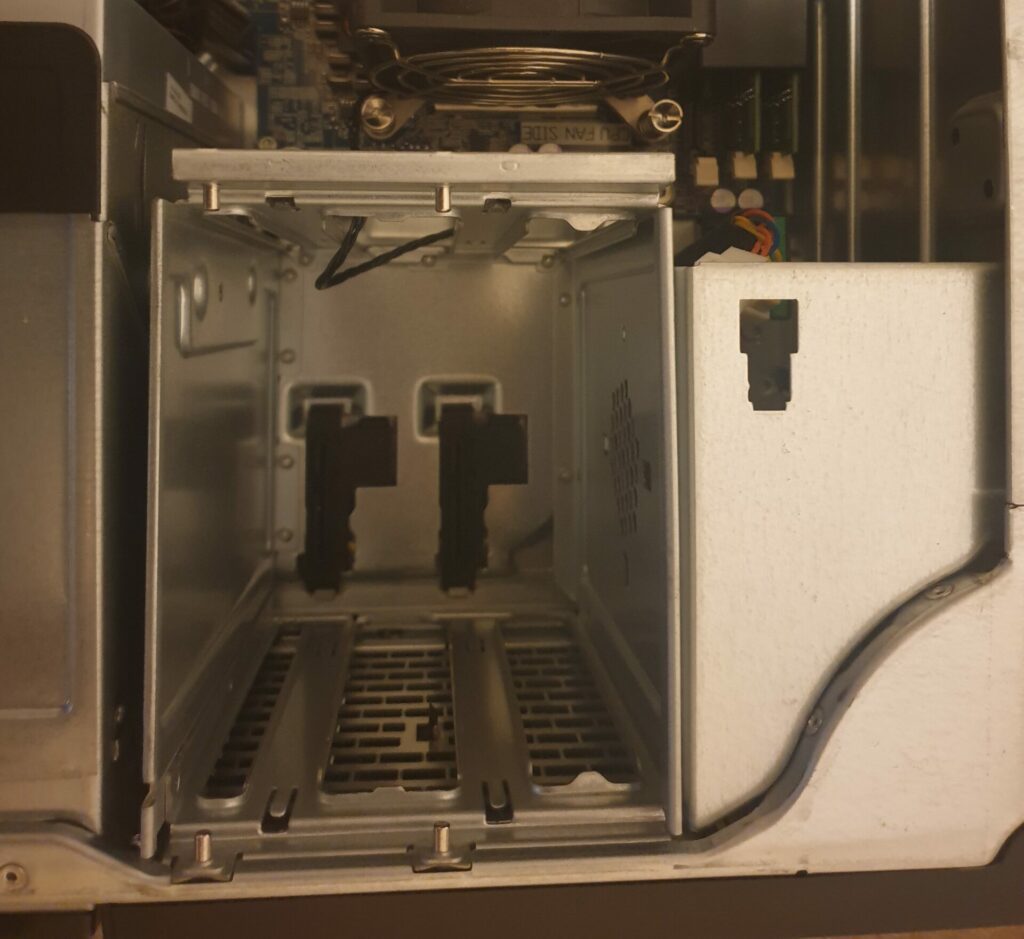
The only physical challenges I faced was due to limitations within the case. The motherboard supports six SATA Gen 2 ports and two of which were occupied by the HDD slots at the top of the case which required propriety caddies. So these needed to be sourced as there was no easy way to remove or retrofit another configuration. Two of 2TB HDD were installed into these caddies. The workstation did not
natively support any other options for storage drive mounting and as it is an older machine does not support NVME or M.2. PCIe would have been an option for SSD mounting, but I felt that would have been a waste of resources. Especially if I plan to add any additional PCIe cards.
Figure 3 (HDD Caddy Bays)
Phase 4
The workstation did however, come with two 5.25” bays, one of which was occupied by an Internal DVD drive, and the other the two 500GB HDDs. As I am using the system to run VMs, rather than media related work this was not required in the system. Any bootable media that I did require could be mounded to a USB using a tool such as Rufus.
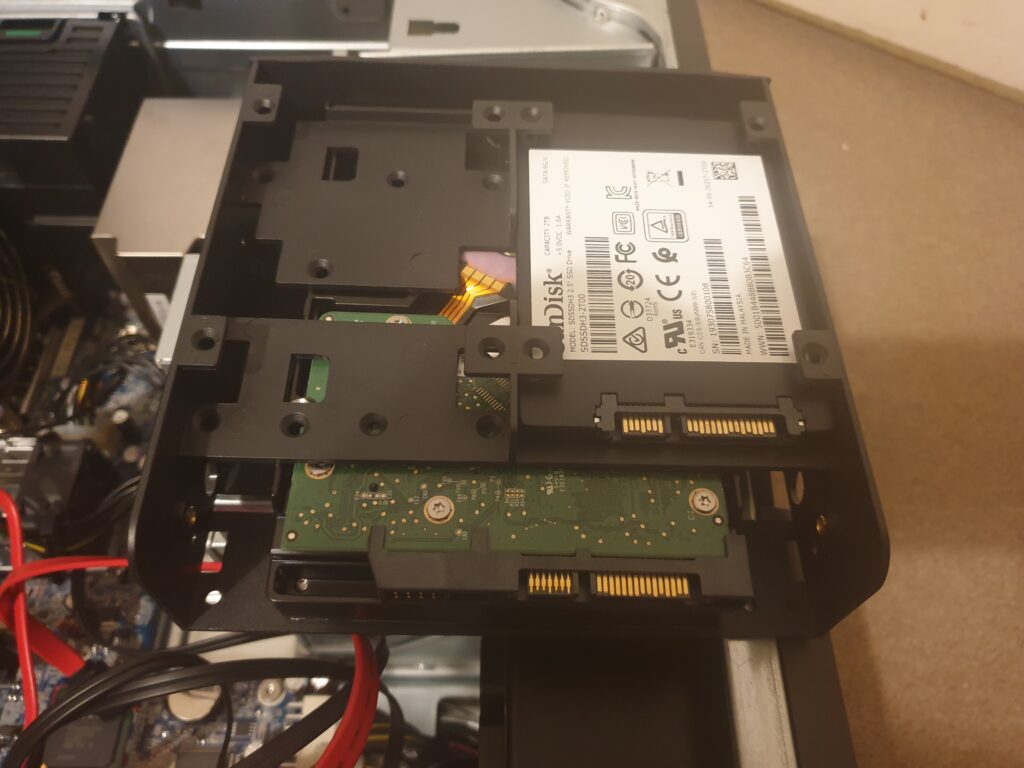
I replaced the DVD drive with a 5.25” to 3.5” HDD adapter. The benefit of this adapter is that it supported a number of configurations, from one 3.5” HDD to six 2.5” SSDs. I used this adapter to install my third 2TB HDD for my RAID 5 array, as well as by 2TB SSD boot drive. The 5.25” to 2.5” adapter with the two 500GB drives still remain in the system and may be used to run a type one hypervisor such as Proxmox
Figure 4 (5.25" to 3.5" Adapter)
2TB SSD (OS Drive)
2TB WD NAS HDD
Figure 5 (Caddies)
X2 2TB WD NAS HDD

Phase 5
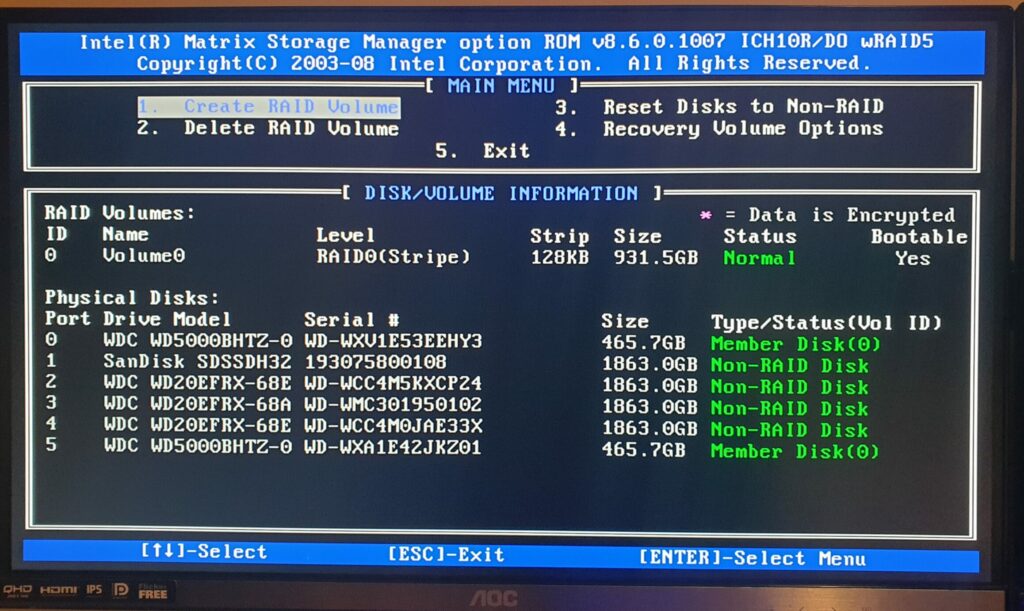
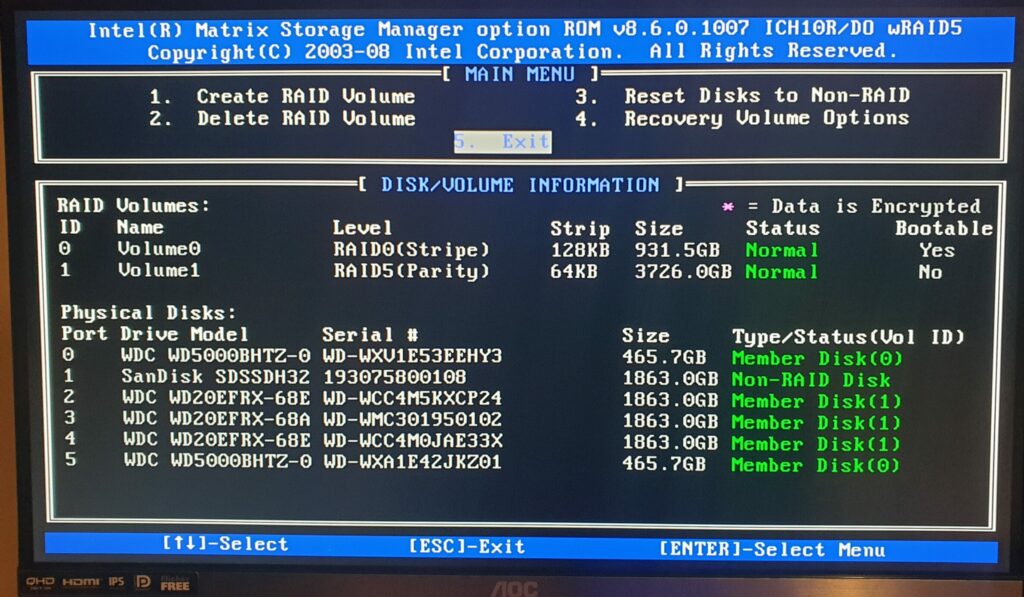
The RAID configuration was set up using Intel Matrix Storage Manager. I was able to identify what drives were connected to the SATA controller, and whether they were part of an existing RAID volume/member disk. As you can see, the two 500GB HDDs were connected to SATA ports 0 & 5 and were already part of an existing RAID 0 volume/member disk. I was able to identify my SanDisk drive for
the OS/applications, which left my three 2TB HDDs.
Figure 6 Intel Matrix Home Screen
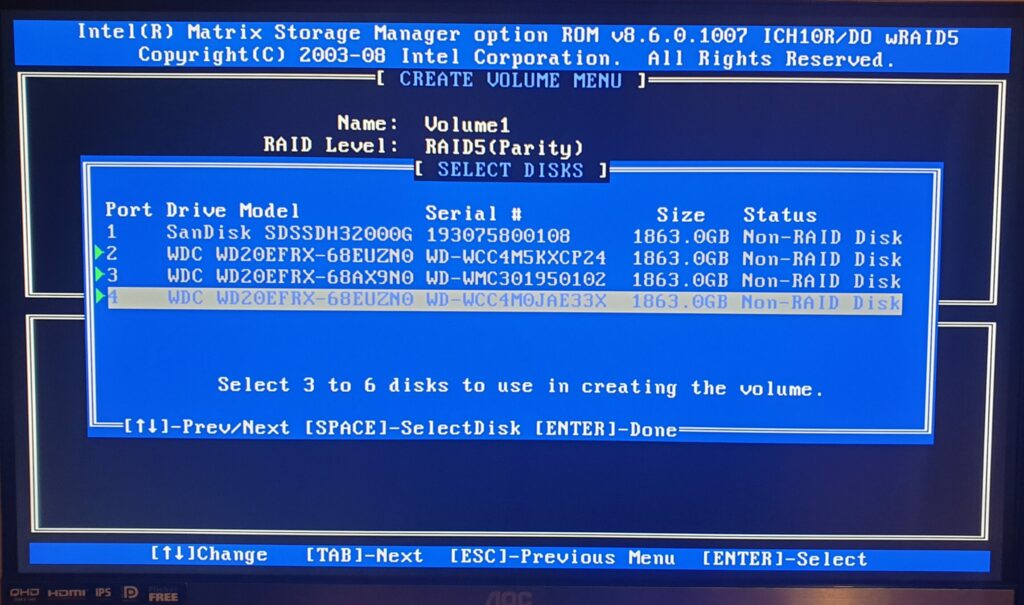
From here I was able to create a new RAID volume which gave me the option to select the RAID type (5 in this case), as it allowed me to have a parity drive for redundancy. I was the able to select the disks I wanted to include. As you can see, only the disks that were not already part of a RAID appear. The drives
to create the RAID were on SATA ports 2, 3, 4 and I was able to identify this by the storage size and the brand of drive. Once selected I could then create and finalize the volume. Confirmation of this is then
shown on the Intel matrix home screen.
Figure 7 Intel Matrix RAID Selection
Figure 8 Intel Matrix Disk Availability
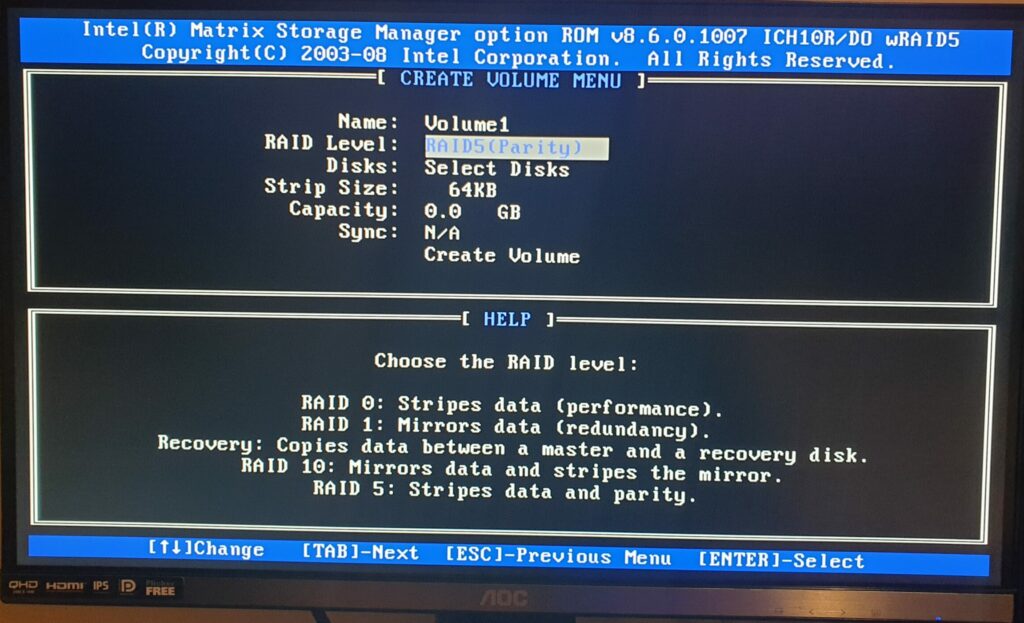
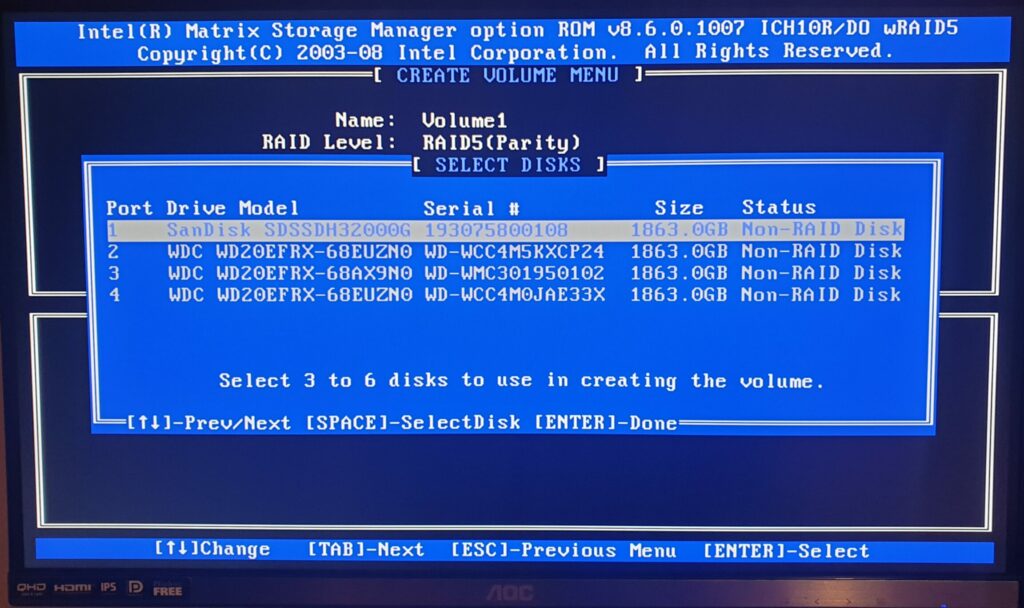
Figure 9 Intel Matrix Disk Selection
Figure 10 Intel Matrix RAID Group Created
Phase 6
In order to utilize this storage in the operating system (Windows 10 Pro) I needed to first check to see if the volume was registered. I was able to confirm this by checking in disk management. The drive volume was present and as expected Windows sees this as one complete usable drive. However it was unallocated and needed to be initialized and mapped to a drive letter. Once initialized the drive volume was ready for operation. I will most likely repurpose this RAID into a dedicated NAS outside of Windows or easier access across my network.
Figure 11 Disk Management (Available Drives)